Modifier l’URL du Back-office
Si vous souhaitez modifier l’url du backoffice il faut :
- Modifier les entrées DNS
- Modifier la configuration Apache
- Modifier la configuration Tomcat
- Modifier la configuration de l’application CMS
- Modifier la configuration de l’application site
Adresse IP, nom de machine et DNS
- Ajouter une nouvelle entrée dans le DNS pour les nouveaux serveurs
- Positionner les nouvelles adresses IP et noms de machine dans le fichier /etc/hosts
Apache
Modifier la configuration d’Apache de manière à utiliser les nouveaux DNS. La localisation des fichiers utilisés dépend de l’OS et des choix de l’administrateur système. Il y a un fichier pour le CMS et un fichier pour le Site. Ces fichiers sont généralement nommés :
- /etc/apache2/sites-enabled/httpd-cms.conf pour le CMS
- /etc/apache2/sites-enabled/httpd-site.conf pour un Site.
- Effectuer ces opérations pour chacun des nouveaux serveurs.
Tomcat
Si vous avez suivi la documentation d'installation et utilisé notre template de configuration tomcat alors vous n'avez rien à modifié dans tomcat, sinon il faut regarder le fichier server.xml et les déclarations des webapps.
Configuration du CMS
Aller dans l’interface d’administration du CMS pour mettre à jour la configuration :
- http://cms.xxxxxx.fr/_admin (utiliser les identifiants de l’administration, par défaut : admin/admin)
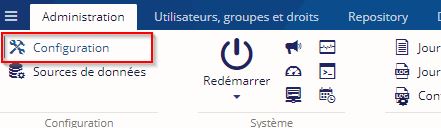
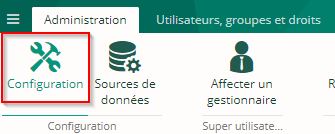
- Cliquer sur l’outil de configuration

- Modifier si besoin les interconnexions avec les services utilisés tel que LDAP, Apogée…
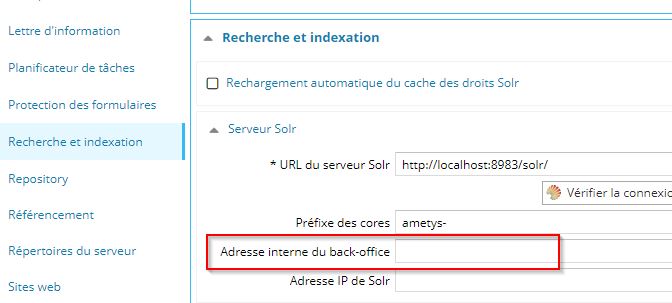
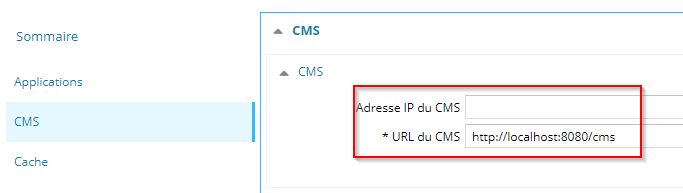
- Dans le menu de gauche, cliquer sur CMS et remplacer l'adresse du back-office

- Si nécessaire, modifier l'URL interne du back-office renseignée pour Solr dans le menu Recherche et indexation, en général ce n'est pas necessaire car il est conseillé de configurer cette adresse sur l'adresse locale de tomcat (http://localhost:8080 par exemple).


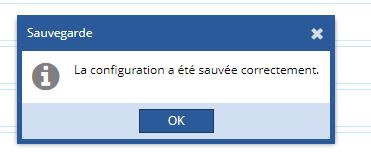
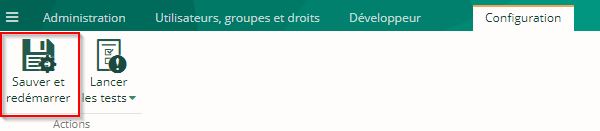
- Dans le ruban contextuel Configuration, cliquer sur « sauver et redémarrer »


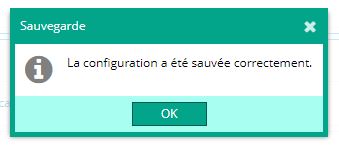
- Attendre l’enregistrement et le redémarrage

Configuration des applications sites
Dans le cas de plusieurs sites, répéter l’opération autant de fois que nécessaire.
Aller dans l’interface d’administration du SITE pour mettre à jour la configuration
- http://www.xxxxxx.fr/_admin (utiliser les identifiants de l’administration, par défaut : admin/admin)
- Cliquer sur l’outil de configuration
- Modifier si besoin les interconnexions avec les services utilisés tel que LDAP, Apogée…
- Dans le menu de gauche, cliquer sur CMS et remplacer l'URL et éventuellement l'IP du CMS. Il est conseillé de laisser les applications communiquer sur le port de Tomcat (8080 par défaut).

- Dans le ruban contextuel Configuration, cliquer sur « sauver et redémarrer »
- Attendre l’enregistrement et le redémarrage


Modifier l’URL du Front-office
Attention, on parle ici de modifier l’URL de l’application front-office, qui n’est pas forcément celle d’un site hébergé.
Comme dans le cas de la modification de l’URL du backoffice, vous devez modifier le DNS, la configuration apache et tomcat. Pour plus de détail vous pouvez vous reporter aux paragraphes correspondants dans le chapitre précédent, la procédure est la même.
Ce chapitre s’intéresse aux modifications de la configuration du CMS pour la nouvelle URL du site.
Configuration du CMS
Aller dans l’interface d’administration du CMS pour mettre à jour la configuration
- http://cms.xxxxxx.fr/_admin (utiliser les identifiants de l’administration, par défaut : admin/admin)
- Cliquer sur l’outil de configuration
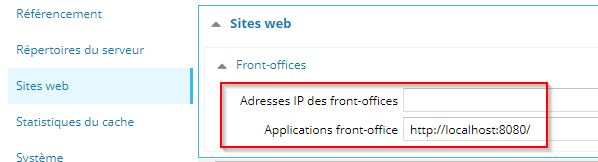
- Dans le menu de gauche, cliquer sur Sites web et remplacer les adresses des applications front-office et les adresses IP des front-office par les nouvelles. Il est conseillé de laisser les application communiquer sur le port de Tomcat (8081 par défaut) et les IP sont celles par lesquelles le CMS vois les sites (lors de requête d'un site vers le CMS).d’un Site vers le CMS).
- Dans le ruban contextuel Configuration, cliquer sur « sauver et redémarrer »
- Attendre l’enregistrement et le redémarrage

Modification de l’URL d’un site
Modification de la configuration du CMS
Se connecter à l’interface d’administration du CMS :
- http://cms.xxxxxx.fr/_admin (utiliser les identifiants de l’administration, par défaut : admin/admin)
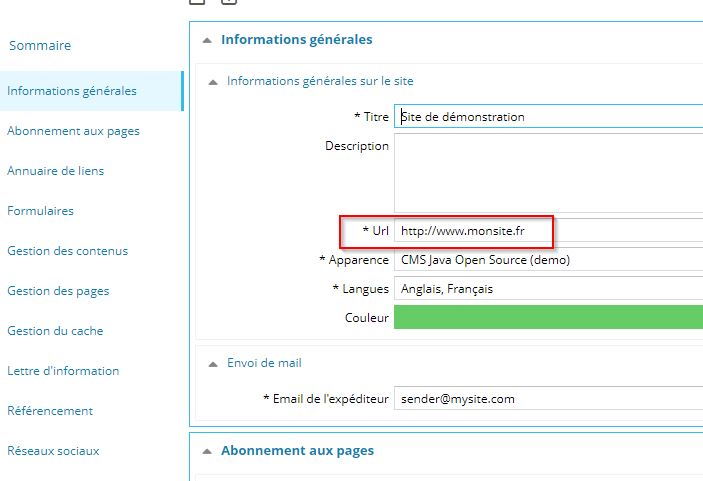
- Cliquer sur Sites

- Pour chaque site, cliquer sur le site, puis sur « Configurer »
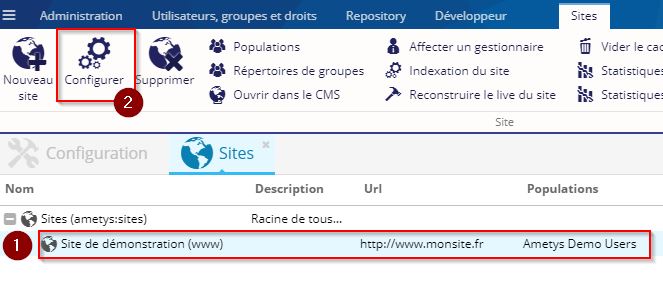
- Changer au minimum l’URL, vérifiez le titre et la description.


Modification des règles Apache
Il faut modifier le fichier de règles correspondant au site dont vous voulez modifier l’URL. Ce fichier est situé dans /etc/apache2/sites-enabled/ (cela peut varier en fonction de votre système d’exploitation) et en règle générale est nommé selon la nomenclature <url>.conf
- Renommer ce fichier avec le nouveau DNS,
- Remplacer dans le fichier toutes les références à l’ancien DNS par le nouveau DNS,
- Recharger la configuration apache en faisant « service apache2 reload » (cela peut varier en fonction de votre système d’exploitation)
Tester votre nouvelle configuration
- Se connecter à la nouvelle URL du CMS
- Créer des pages et des contenus
- Valider les contenus
- Se connecter à la nouvelle URL du site, vérifier que les pages qui ont été validées sont bien disponibles sur le site.