Introduction
Depuis l'interface d'administration, Cliquez sur le bouton Configuration pour accéder à la configuration de votre application CMS :

Les paramètres sont classés par catégories. Un sommaire de ces catégories est visible sur la gauche de votre écran, il permet d'accéder directement à la configuration d'une catégorie en cliquant sur celle-ci :
Il est possible de replier/dérouler les catégories en cliquant sur la flèche à gauche de l'intitulé de la catégorie. Dans l'illustration ci-dessous, la catégorie Recherche et indexation est repliée, tandis que la catégorie Repository est déroulée.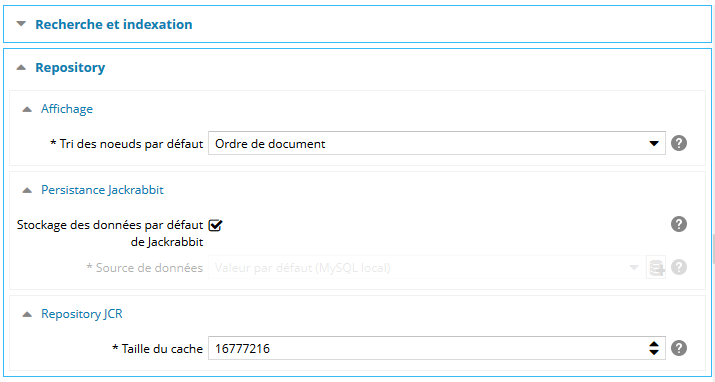
Une bulle d'aide à la saisie s'affiche quand l'utilisateur déplace le curseur de sa souris sur l’icône ![]() située à la droite de chacun des champs du formulaire.
située à la droite de chacun des champs du formulaire.
Liste des paramètres de configuration
La liste des paramètres disponibles dépend des fonctionnalités réellement déployées sur votre application. Ici nous présentons la configuration telle qu'elle est visible dans l'application de démonstration d'Ametys.
|
Dans la catégorie CMS, spécifiez l'adresse internet de l'application back-office (CMS). Cette URL sert de référence pour les accès externes (utilisateurs). Ce paramètre est par exemple utilisé pour construire les adresses fournies dans les mails (liens vers l'application). Veuillez vous référer à la description de l'architecture d'Ametys pour avoir une vision d'ensemble des composants et des communications inter-composants d'Ametys. |
|
|
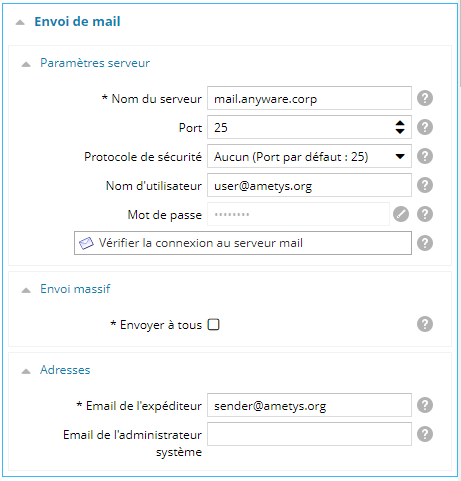
Dans la catégorie Envoi de mail,
|
|
|
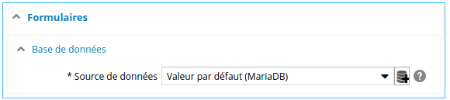
Dans la catégorie Formulaires spécifiez la source de données à utiliser pour la gestion des données des formulaires. Vous pouvez créer la source de données à la volée en cliquant sur le bouton |
|
|
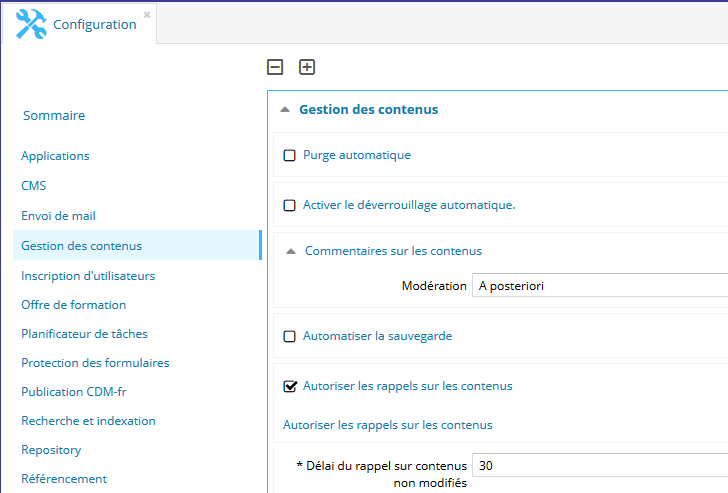
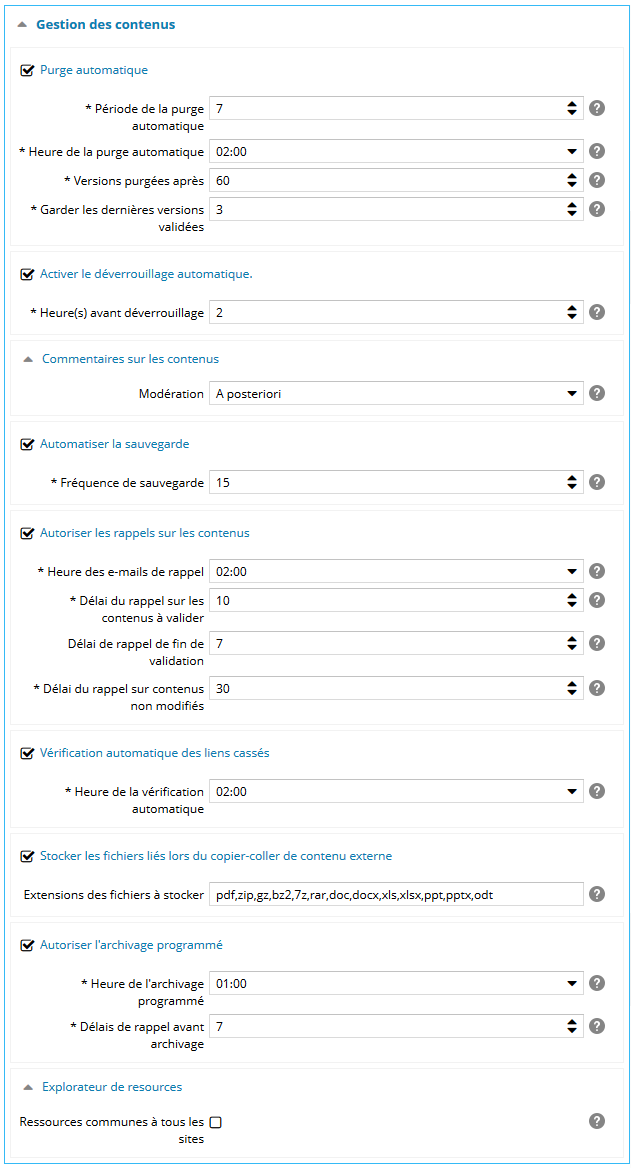
Dans la catégorie Gestion des contenus,
Plus d'informations sur la purge à la page dédiée dans le manuel utilisateur : Purge des contenus.
Ce paramètre est re-définissable dans la configuration par site.
La purge des contenus, le rapport des liens cassés et les processus d'envoi des mails de rappels étant gourmand en ressources, il est conseillé de les lancer durant la nuit. (Il est conseillé de faire de même pour toutes les fonctionnalités automatiques) |
|
|
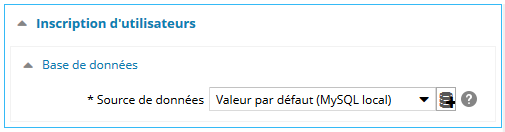
Dans la catégorie Inscription d'utilisateurs, spécifiez la source de données à utiliser pour gérer les données sur l'inscription d'utilisateurs. Vous pouvez créer la source de données à la volée en cliquant sur le bouton |
|
|
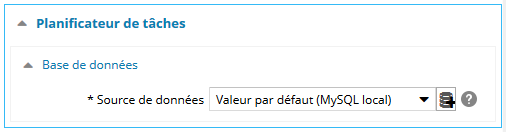
Dans la catégorie Planificateur de tâches, spécifiez la source de données à utiliser pour stocker et manipuler les données du planificateur de tâche. Vous pouvez créer la source de données à la volée en cliquant sur le bouton |
|
|
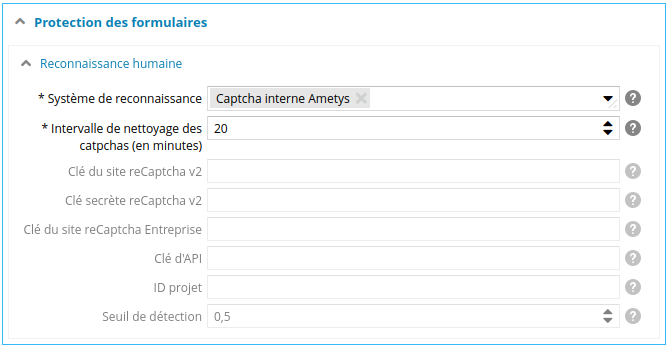
Dans la catégorie Protection des formulaires, choisissez le système de Captcha à utiliser pour protéger vos formulaires du spamming. Deux systèmes de reconnaissance humaine vous sont proposés:
Dans le cas de reCaptcha, il vous faudra préciser la clé du site et la clé secrète fournies par Google. Connectez-vous pour cela sur votre compte Google pour obtenir une clé reCaptcha : https://www.google.com/recaptcha/intro/index.html pour votre ou vos noms de domaine. Puis récupérez la clé du site et la clé sécrète.
Dans le cas de reCaptcha Entreprise, il vous faudra préciser un id de projet, une clé d'API ainsi que la clé de site spécifique à Recaptcha fournies par Google. Pour générer la clé d'API, rendez vous sur la page https://console.cloud.google.com/apis/credentials et créez une clé d'API pour votre projet. Pour générer la clé de site, rendez-vous sur la page https://console.cloud.google.com/security/recaptcha et générez une clé pour votre ou vos noms de domaine. |
|
|
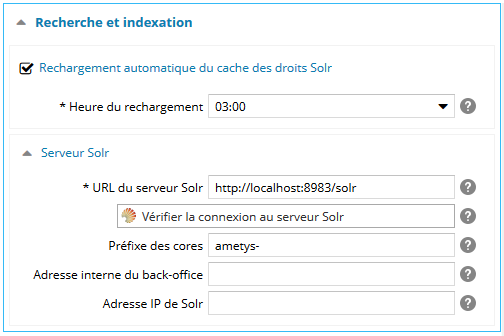
Dans la catégorie Recherche et indexation,
|
|
|
Dans la catégorie Repository,
Vous pouvez créer la source de données à la volée en cliquant sur le bouton
|
|
|
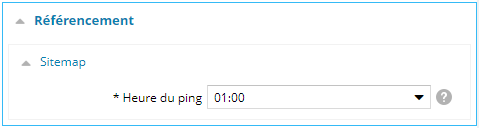
Dans la catégorie Référencement, indiquez l'heure à laquelle vous souhaitez que le ping de la sitemap vers les moteurs de recherche soit effectué. Faire un ping de votre sitemap vers les moteurs de recherche permet de leurs signaler la mise à jour de votre plan du site. |
|
|
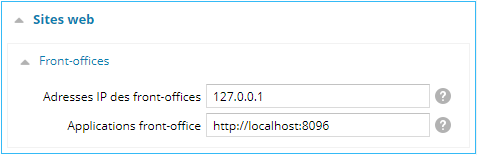
Dans la catégorie Sites web, renseignez la liste :
Veuillez vous référer la description de l'architecture d'Ametys pour avoir une vision d'ensemble des composants et des communications inter-composants d'Ametys. |
|
|
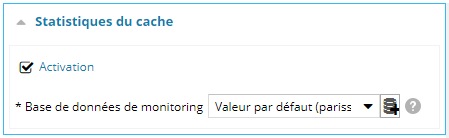
Dans la catégorie Statistiques du cache, cochez la case Activation pour activer le traitement des statistiques de l'utilisation du cache. Veuillez vous assurer d'avoir bien créer les tables SQL nécessaires à cette fonctionnalité (scripts/jdbc_cache_mon.sql), et d'avoir configurer l'accès à la base de données de monitoring dans la rubrique Base de données de monitoring.
|
|
|
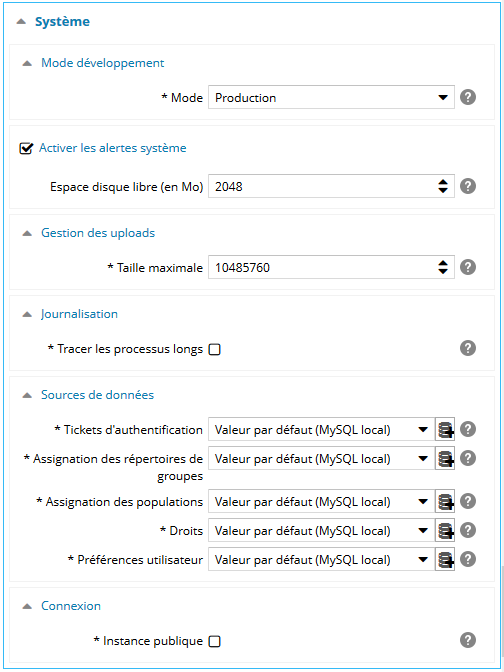
Dans la catégorie Système,
Consultez la page relative à la mise en place de l'antivirus pour plus de précision sur la commande à indiquer.
Vous pouvez créer les sources de données à la volée en cliquant sur les boutons
|
|


Sauvegarde de la configuration
Cliquez sur le bouton Enregistrer et redémarrer du ruban pour enregistrer vos modifications :

Il est recommandé de vérifier les paramètres avant la sauvegarde et le redémarrage de l'application, une pop-up de confirmation s'affiche afin de confirmer votre choix :

L'action Enregistrer et redémarrer coupe les accès au CMS et recharge la nouvelle configuration, cette opération peut-être longue selon la structure de votre installation et la complexité de votre application.