Présentation
Ce module vous permet de créer des formulaires pour vos visiteurs. La saisie des formulaires est possible via l'éditeur en ligne des champs texte riche : voir la documentation Edition des formulaires.
Les données saisies peuvent être envoyées à des applications externes ou directement traitées par le CMS, on parle respectivement de :
- Formulaire externe : les données sont envoyées à des applications externes.
- Formulaire CMS : les données sont traitées en interne.
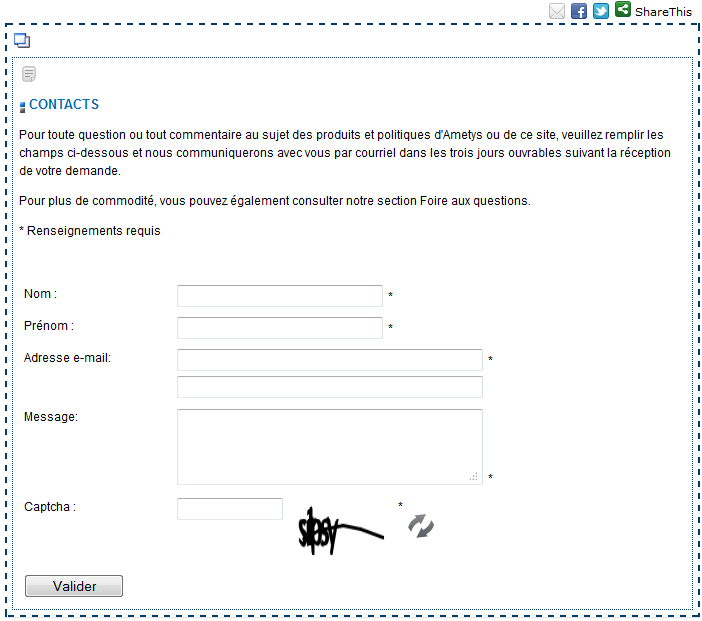
Aperçu
Rendu d'un formulaire de contact :
Principales fonctionnalités
- Éditeur en ligne robuste et intuitif pour saisir vos formulaires dans vos contenus.
- Mise en place d'une validation sur les champs des formulaires : champs obligatoires, nombres min et max, expressions régulières, ... (voir Édition des formulaires)
- Alertes email notifiant les nouvelles soumissions de données. (voir Édition des formulaires)
- Accusé de réception (mail) envoyé aux visiteurs après une soumission.
- Entrées du formulaire : liste les entrées d'un formulaire et permet quelques opérations, telle que la suppression d'entrées, l'export Excel...
- Liste des formulaires : liste des formulaires contenu dans les contenus du site
Accusé de réception
Dans l'onglet d'édition d'un Formulaire CMS, cliquez sur le bouton Accusé de réception pour mettre en place un tel système.

La fenêtre de paramétrage de l'accusé de réception s'ouvre :
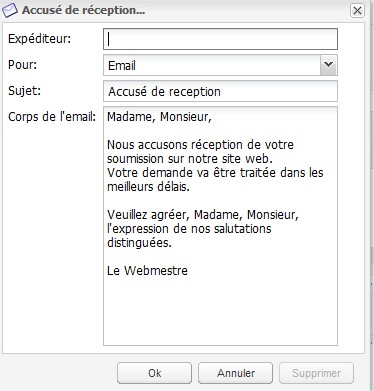
Remplir les champs :
- Expéditeur : Adresse email qui apparaîtra en tant qu'expéditeur de l'email de l'accusé de réception. Laisser vide pour utiliser la valeur par défaut (paramètre de l'application).
- Pour : Sélectionner le champ du formulaire de type "email" qui sera utilisé comme destinataire de l'accusé de réception.
- Renseigner ensuite le sujet et le corps de l'email.
Votre formulaire doit contenir au moins un champ de type email pour pouvoir mettre en place cette fonctionnalité :
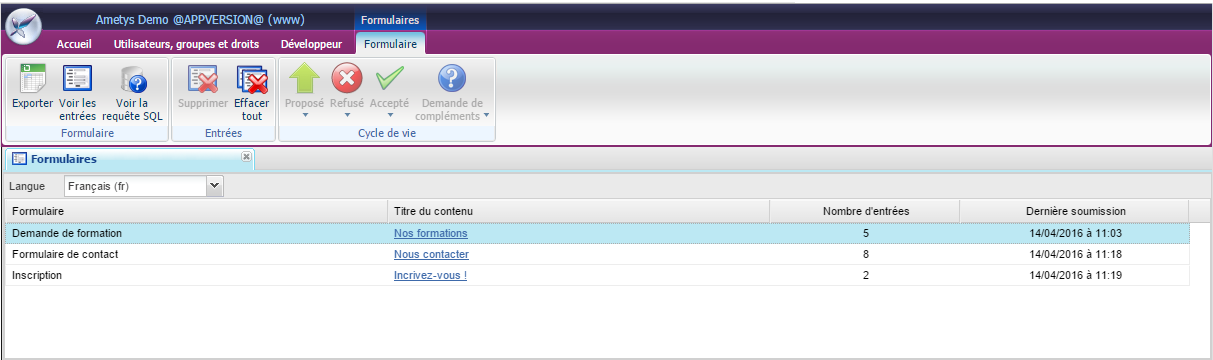
Liste des formulaires
Depuis l'onglet Accueil, l'outil "Formulaires" vous permet de visualiser l'ensemble des formulaires présents dans les contenus du site.

A partir de cet écran, vous pouvez:
- Exporter : export au format Excel des entrées du formulaire
- Voir les entrées: accès aux données du formulaires, c'est à dire l'ensemble des réponses aux formulaires (on peut réaliser la même opération avec un double-clic)
- Voir la requête SQL : affiche le texte de la requête SQL utilisée pour récupérer l'ensemble des données du formulaire, à des fins d'exploitation
- Effacer tout : suppression de toutes les entrées
- Ouvrir le contenu contenant le formulaire en cliquant sur le lien de la colonne "Titre du contenu"
Entrées du formulaire
Vous pouvez accéder aux entrées d'un formulaire, soit à partir de l'outil "Formulaires" présenté ci-dessus, soit à partir d'un contenu.
Dans l'onglet Contenu, cliquez sur le bouton Entrées du formulaire.
La page doit contenir au moins un formulaire pour que ce bouton soit actif.

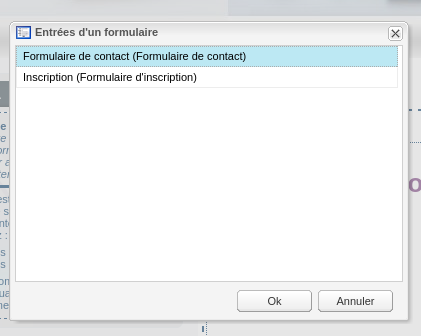
Entrées du formulaire
S'il n'y a qu'un formulaire, l'outil s'ouvre directement sur la seule possibilité. Sinon, une fenêtre s'ouvre et permet de sélectionner un formulaire parmi les différents formulaires possibles.
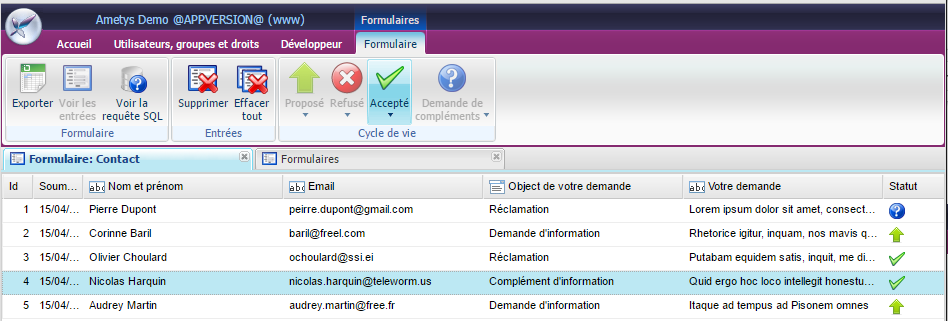
L'outil de visualisation des entrées du formulaire se présente comme ci-dessous lorsque le formulaire possède un cycle de vie (voir Edition des formulaires - v1.9.0, v1.10.0, v1.11.0).
A partir de cet écran, vous pouvez:
- Exporter : export au format Excel des entrées du formulaire
- Voir les entrées: accès aux données du formulaires, c'est à dire l'ensemble des réponses aux formulaires (on peut réaliser la même opération avec un double-clic)
- Voir la requête SQL : affiche le texte de la requête SQL utilisée pour récupérer l'ensemble des données du formulaire, à des fins d'exploitation
- Supprimer: supression de une ou plusieurs entrées
- Effacer tout : suppression de toutes les entrées
- Faire avancer le cycle de vie des entrées
Cycle de vie standard
Le cycle de vie est entièrement paramétrable (voir Plugin Formulaires - Manuel d'intégration v1.9.0).
Le cycle de vie standard, proposé par défaut, possède 4 états :
- Proposé : un visiteur a soumis une demande (réponse au formulaire)
- Accepté : le webmaster a accepté la demande
- Refusé: le webmaster a refusé la demande
- Demande de compléments: le webmaster a demandé des compléments au soumissionnaire de la demande
Demande de compléments
Dans le cycle de vie standard, la demande de complément peut donner lieu à l'envoie d'un mail au visiteur ayant répondu au formulaire.
Ceci est cependant soumis à la condition que le formulaire possède un champ de type "email".
Si tel est le cas, la boite de dialogue suivante sera affichée lors de la demande de complément.
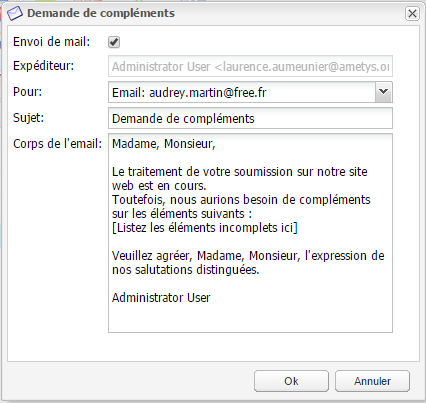
Cochez la case "Envoi de mail" et personnalisez le texte du mail à envoyer.
Si vous souhaitez faire avancer le workflow sans envoyer de mail, décochez la case "Envoi de mail".