Connexion avec Google
Créer un compte Google pour votre institution
Tout d’abord, veuillez créer un compte Google pour votre institution.
Ensuite rendez-vous sur ce lien “https://console.cloud.google.com/apis” et créer un projet pour votre site.
Configuration projet Google
Pour commencer, vous devez configurer l’écran de consentement.
Cliquez sur “écran de consentement” sur le panneau à gauche.
Sur la première page, choisissez un type d'utilisateur : interne ou externe.
Sur la seconde page, entrez les informations de votre application.
Sur la troisième page, “Niveau d’accès”, vous devez ajouter les champs : openid, email et profile. Pour ce faire, cliquez sur “ajouter ou supprimer des champs d’application”, cochez les 3 champs requis puis cliquez sur “mettre à jour”. Entrez des utilisateurs de test si vous le souhaitez.
Une fois l’écran de consentement créé, rendez-vous sur la page “Identifiants” en cliquant sur “Identifiants” sur le panneau à gauche.
Cliquez sur “Créer des identifiants” et créez un “ID Client OAuth”, sélectionnez le type d'application : "Application web" et donnez lui un nom.
Dans la catégorie “URI de redirections”, ajoutez les URI suivantes :
- <BOserver_url>/_extra-user-management/oidc-callback
(<BOserver_url> par ex: https://cms.mywebsite.com ou https://www.mywebsite.com/cms) - <SITEserver_url>/_extra-user-management/oidc-callback
(A saisir plusieurs fois si vous utilisez plusieurs url racines comme https://www.mywebsite.com et https://www.otherwebsite.com)
Une fois que vous avez validé, une fenêtre s'affiche vous indiquant deux informations (à noter pour plus tard) :
- Votre ID client
- Votre code secret client
Vous pouvez retrouver ces informations en cliquant sur “Modifier le client oauth”.
Une fois ces étapes de configurations google effectuées, vous devrez retourner sur l'”Écran de consentement” et “publier votre application”, vous aurez alors un échange avec google par mail afin de valider celle-ci.
Configuration de la connexion dans le CMS
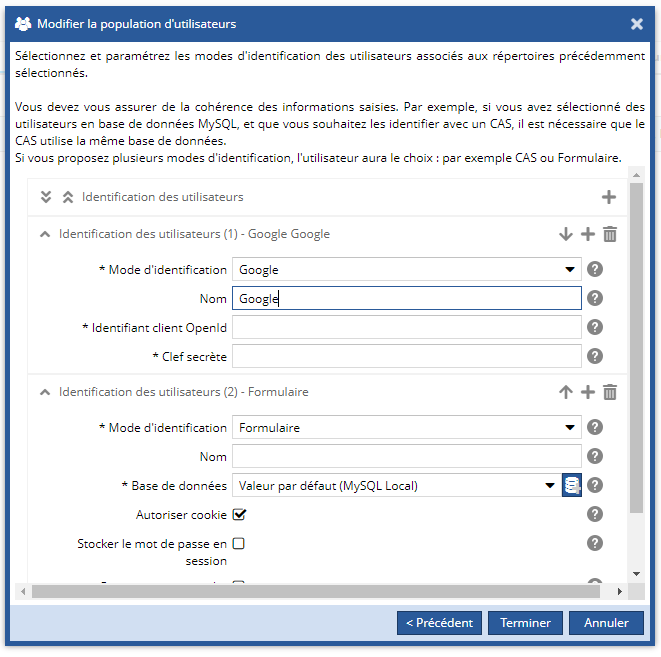
Rendez-vous sur l'espace administrateur du CMS (_admin) et ajoutez un nouveau type d'identification des utilisateur à une population existante ou une nouvelle population.
Dans “Mode d’authentification” choisissez “Google”.
Dans “Identifiant client OpenId” et “Clé secrète” entrez respectivement votre ClientID et votre code secret générés plus tôt. Puis cliquez sur "terminer".
Vos utilisateurs peuvent désormais se connecter à l’aide de leur compte google.