Le plugin Lettre d'information fournit un outil back-office pour la gestion des lettres d'information.
Outil "Lettre d'information"
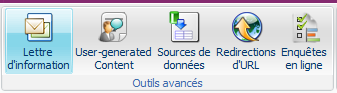
Cliquer sur le bouton Lettre d'information de l'onglet Accueil pour ouvrir l'outil.
Cet outil se présente sur forme d'un arbre et vous permet de créer, modifier ou supprimer des catégories de lettres ou des lettres.
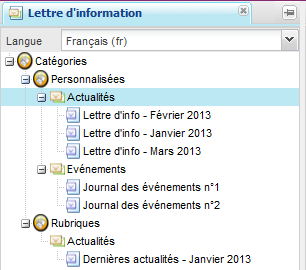
Gestion des catégories
Chaque lettre d'information doit être liée à une catégorie. C'est la catégorie qui détermine le gabarit de la lettre d'information (son rendu) et la liste des abonnés.
Il existe deux types de catégories :
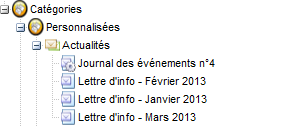
- Personnalisées : Il s'agit de catégories "libres" pour créer autant de catégories de lettres d'informations que souhaitées, par exemple Générale, Culture, Actualités...
- Rubriques: Il s'agit de de catégories liées aux rubriquex du site (ex: Université, Recherche, ...). Ces catégories sont automatiques et non modifiables. Il s'agit des rubriques ou pages du site portant l'étiquette "Catégorie de newsletter"
Pour créer une nouvelle catégorie :
- sélectionnez le type de lettre "Personnalisées"
- cliquez sur le bouton Nouvelle catégorie
- une pop-up s'ouvre permettant de renseigner le nom de la catégorie (et optionnellement la description)
- entrez le nom et valider

Pour chaque type de catégorie, il est possible de définir plusieurs catégories et sous-catégories
.
Pour que notre catégorie puisse permettre la création de lettre d'information, il faut lui affecter un gabarit.Pour affecter un gabarit ou changer de gabarit:
- sélectionnez la catégorie
- cliquer sur le bouton Gabarit
- cliquer sur le gabarit désiré

Création d'une lettre d'information
Une lettre d'information prend place dans une catégorie.
Pour créer une nouvelle lettre:
- sélectionnez une catégorie
cliquer sur le bouton Nouvelle lettre d'information
- entrez le nom de la lettre d'information

Si le bouton Nouvelle lettre d'information est grisé c'est probablement que la catégorie n'a pas de gabarit affecté.
La lettre alors créée est vierge, elle correspond au gabarit qui lui a été affecté (le choix du gabarit dépend des possibilités qu'offre la charte graphique utilisée).
Pour visualiser la lettre, double-cliquez sur celle-ci dans l'outil.

Une lettre d'information est un contenu de type newsletter, il fait partie de la base de contenus gérés par le CMS.
Edition de la lettre d'information
Pour éditer une lettre d'information :
- sélectionnez-la dans l'outil de droite
- cliquez sur le bouton Modifier le contenu
- vous éditer la lettre d'information de la même manière qu'un article ou tout autre contenu
- les outils disponibles en édition sont les mêmes que pour les autres contenus.Il est possible notamment d'utiliser la fonctionnalité dernières publications très utilisée pour les lettres d'information, permettant d'insérer dans les derniers articles, actualités; ... publiés.
 | En général des zones ont été définies dans la newsletter ; une fois en édition, il suffit de positionner le curseur dans une zone pour ajouter du texte, des images, les dernières publications dans cette zone. |
 | Si il possède les droit suffisants, le webmaster peut aussi afficher et éditer le code HTML pour modifier très finement la newsletter (onglet Développeur -> Modifier le code source). |
A la fin de l'édition, cliquer sur Enregistrer et fermer de l'onglet Edition pour enregistrer et fermer l'édition.
| Comme sur tous les contenus, il est possible d'afficher les propriétés, l'historique... |
Envoi de la lettre d'information
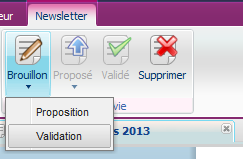
La lettre d'information, comme tous les autres contenus, est soumise au cycle de vie (workflow).
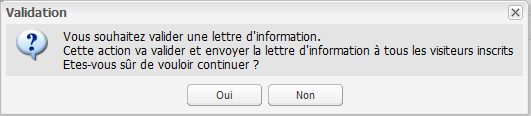
La lettre d'information est envoyée à tous les visiteurs inscrits lorsqu'elle est validée.
Pour envoyer la lettre d'information, il suffit de valider la lettre d'information.
Création d'une lettre d'information automatique
Une lettre d'information automatique est une lettre d'information pré-paramétrée qui est envoyée aux abonnés selon une périodicité définie.
La lettre d'information est créée, remplie, validée et envoyée aux utilisateurs abonnés sans aucune intervention d'un contributeur ou webmaster.
Les lettres d'information automatiques sont paramétrées par l'intégrateur de l'application. Voir la page Plugin Lettre d'information - Lettre d'information automatique v1.6.0 pour créer et paramétrer une lettre d'information automatique.
Pour ajouter une lettre d'information automatique, sélectionnez une catégorie et cliquez sur "Newsletter automatique"

Dans la boite de dialogue, sélectionnez parmi les lettres automatiques existantes celle ou celles que vous souhaitez ajouter à cette catégorie.

Les lettres automatiques ne nécessitent aucune autre action de votre part.
Dans l'arbre les lettres d'information automatiques sont visibles par une icône différentes
Une catégorie pour contenir indifféremment des newsletters manuelles et automatiques
.
Gestion des abonnés
Sélectionnez une catégorie pour gérer ses abonnés

Liste des abonnés
Le bouton Liste des abonnées permet d'afficher la liste des inscrits pour la catégorie courante.
Exemple de visualisation d'une liste d'abonnés

Exporter la liste
Le bouton Exporter la liste permet d'exporter cette liste au format Excel (et compréhensible par les autres tableurs).
Exemple d'export

Importer une liste d'abonnés
Le bouton Importer des abonnés permet d'importer un grand nombre d'abonnés depuis un fichier texte (.txt) ou un fichier de tableur type Excel (.csv).
Un clic sur ce bouton ouvre la fenêtre suivante.

Vous pouvez choisir de supprimer les abonnés existants en cochant la case correspondante.
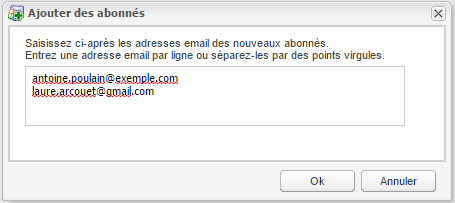
Ajouter des abonnés
Cliquez sur le bouton Ajouter des abonnés pour ajouter manuellement des abonnés.
Dans la boite de dialogue qui s'ouvre, saisissez les adresses email des abonnés séparés par les points-virgules ou une adresse email par ligne.
Supprimer des abonnés
Sélectionnez dans la liste des abonnés les abonnés à supprimer, puis cliquez sur le bouton Supprimer des abonnés.
Abonnement des utilisateurs sous la forme de préférences
Les catégories de lettres d'information sont disponibles sous la forme de préférences utilisateur. Cela donne la possibilité de présenter un formulaire permettant à un utilisateur connecté de s'abonner ou se désabonner facilement aux différentes catégories de lettres d'information :
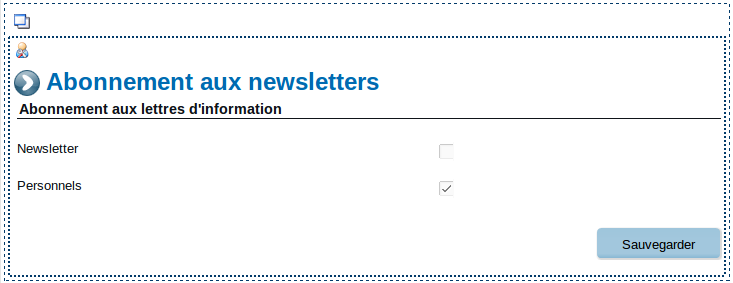
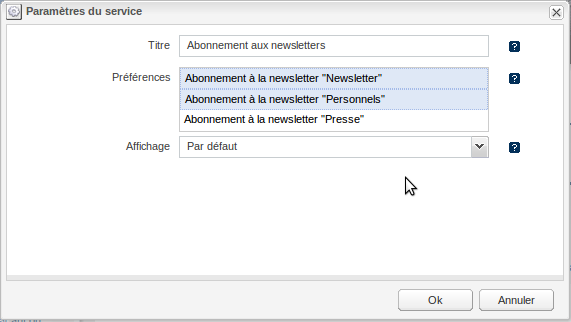
Pour cela, il suffit d'insérer dans une page un service "préférences utilisateur" et de sélectionner les catégories de lettres d'information voulues :
Une page contenant ce service doit impérativement être en accès limité.