Cette section explique comment modifier une formation.
- Trouver la formation à modifier
- Modification d'une formation
- Modification d'une formation par le plan du site
- Sauvegarder
Trouver la formation à modifier
La première étape consiste à rechercher une formation, voir la rubrique rechercher une formation.
Pour créer une formation, allez consulter la page création d'une formation.
Modification d'une formation
Après avoir trouvé la formation que vous voulez modifier, ouvrez la formation dans la zone centrale.
Vous pourrez modifier l'offre de formation dans l'onglet Formation bouton Modifier le contenu.

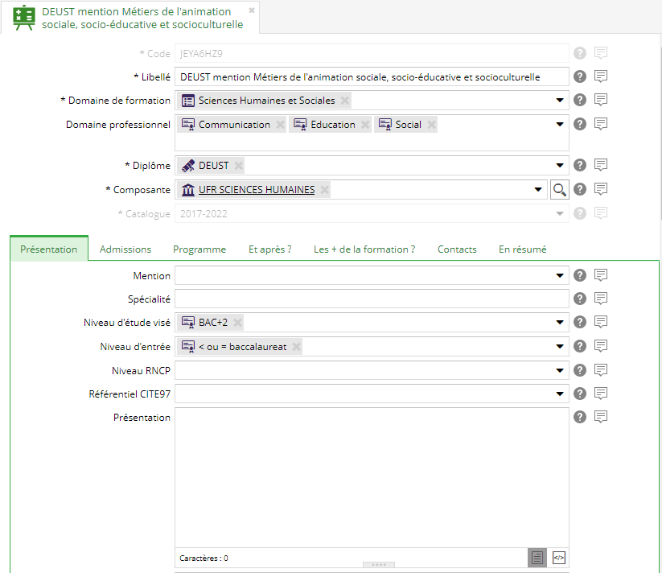
La modification du contenu ouvre un formulaire de saisie, organisé en onglets.
Les champs qui sont obligatoires sont suivi d'une Astérisque (*).
En fonction de vos droits il est possible que des champs soient désactivés mais présents dans le formulaire.
Les différents types de champs de la brique Ametys ODF
Champs textes riches
- Permet d'utiliser les outils de mise en forme (voir page Edition de champs riches)
- La zone de saisie peut être redimensionnée, grâce à la poignée en bas au centre
- Peut avoir une limitation du nombre de caractères : affiché en rouge si dépassement de la limite
- Le
 à droite du champ contient une indication de saisie (à survoler avec la souris)
 - Il est possible de saisir un commentaire associé au contenu, en cliquant sur le picto
 bulle
bulle - Mode expert : bouton
 , permet de passer en mode de saisie HTML
Champs liste à choix simple
Permet de choisir une seule information dans une liste déroulante avec l’icône flèche ou de commencer à écrire le nom du diplôme.
Ce champ est en auto-complétion.
Champs liste à choix multiple
Maintenez la touche CTRL enfoncée pour sélectionner ou désélectionner les entrées de la liste.
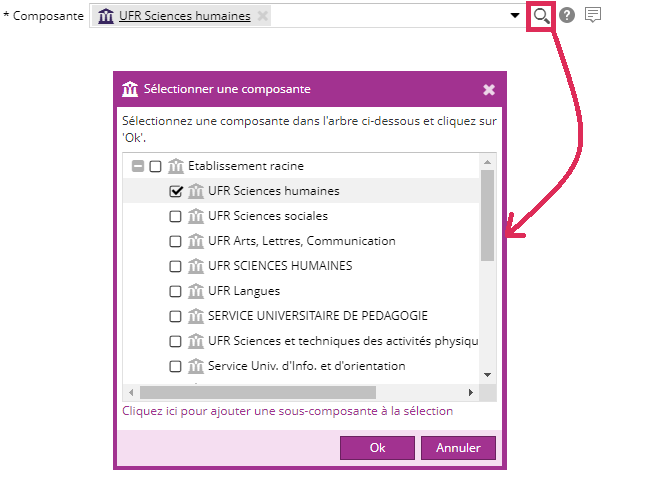
Champs de sélection de contacts ou composantes
Ce champ permet de sélectionner le ou les éléments dans une liste déroulante où vous pouvez cliquer sur le picto pour ouvrir la boite dialogue de sélection.
Situé en bas de la boite de dialogue vous pouvez créer une nouvelle composante.
Champs de géolocalisation
Un champ de type géolocalisation permet de sélectionner un point sur une carte Google Map afin de définir des coordonnées géographiques (latitude, longitude).
Modification d'une formation par le plan du site
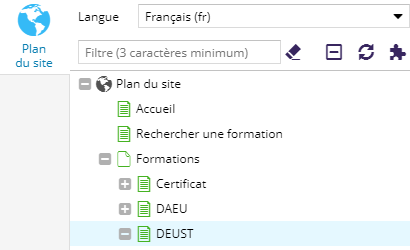
Il est possible de modifier une formation par le plan du site, pour cela il vous suffit de chercher dans le plan du site la formation que vous voulez modifier.
L'outil Plan du site se situe dans l'onglet Accueil.

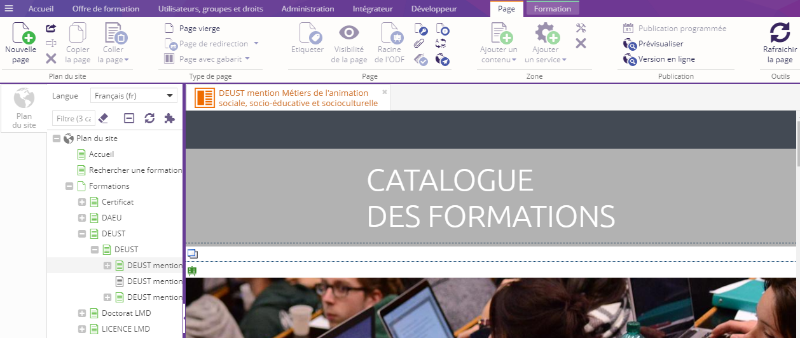
En double cliquant sur une page de formation, la formation s'ouvre dans la zone centrale de la fenêtre.
Pour modifier la formation sélectionnée la zone dans laquelle la formation est insérée en cliquant sur l'icône ![]() .
.
Une fois la zone sélectionnée cliquez dans l'onglet Formation sur le bouton "Modifier le contenu".
Sauvegarder
Pour sauvegarder vos modifications apportées aux différents champs de votre contenu.
Dans l'onglet Contenu, cliquez sur le bouton Enregistrer et fermer.
Vous pouvez enregistrer régulièrement votre travail en cliquant sur Enregistrer.
Déplier le menu du bouton Enregistrer & Fermer en cliquant sur sur le pictogramme flèche.
Si vous voulez abandonner vos modifications en cours vous pouvez Fermer sans enregistrer.
Ametys à une fonction de sauvegarde automatique dans le paramètre de configuration "Gestion des contenus".


